.png&w=3840&q=75)
If you are a Front-End Developer you probably love Firebase! It is Mobile-Backend-as-a-Service backed by Google, that provides to web and mobile App Developers all back-end functionalities they need, such as Authentication and Authorization, Real Time DB, Files Storage and also Cloud functions for building a micro-services architecture.
But if you are supposed to build a Business Application, it could likely be that you’ll have to integrate it with some data coming from an SAP back-end system or -vice versa – that you have to consume some data stored in Firebase DB into SAP, e.g. for analytical purposes.
In this article I will show how to build a Web App based on Firebase, that consumes data from an SAP back-end system.
We will use the well-known (at least to ABAPers) “BC_TRAVEL” data model, that is available in any SAP system, and we’ll create a web application that can consume its data content.
In the end, we will move from this classic SAPGUI visualization:
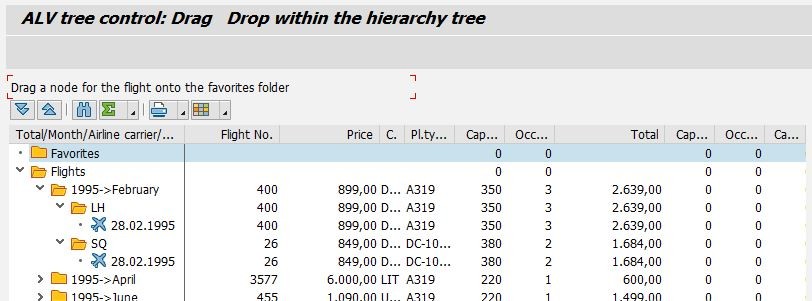
to this brand new Web-App screens:
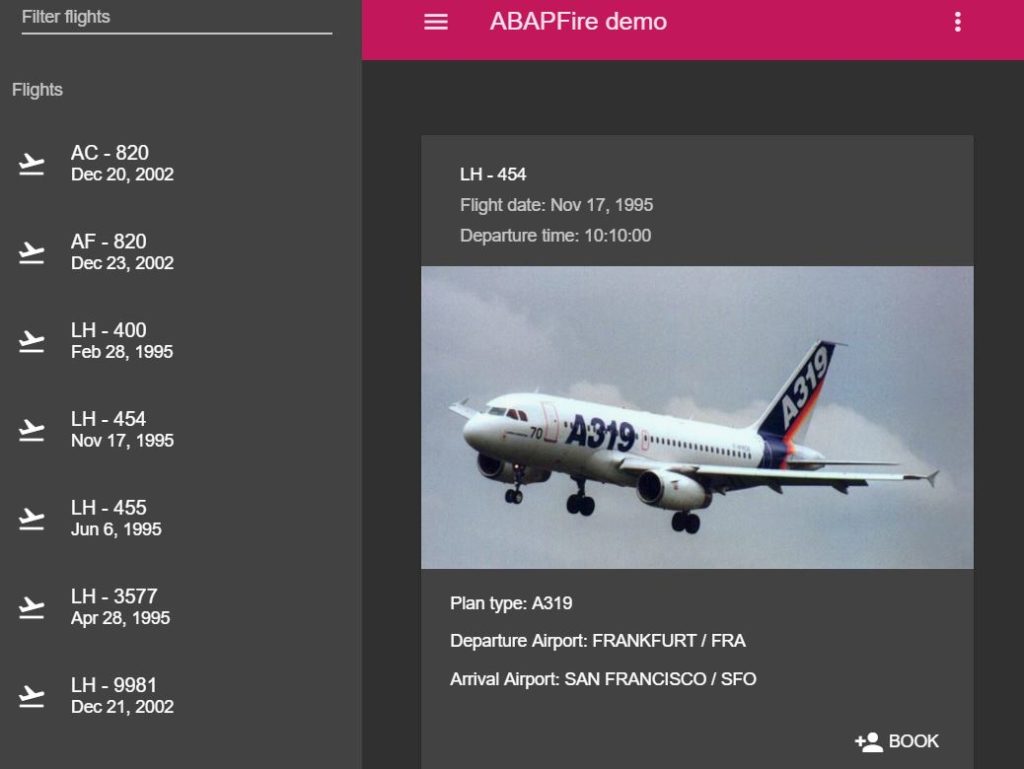
You can preview the final result of the the demo application at this link here.
We now start our implementation exercise by using the Firebase REST API inside an ABAP program, so that we can store SAP data directly into Firebase DB.
For making it easier, I already developed a minimal Helper Library ready for use: http://alborghetti.github.io/ABAPFire/
To install this library in your system, you can use abapGit:
Create an executable program called ZABAPGIT and past the code you can download here.
Execute ZABAPGIT and click on clone, in the popup insert following data:
- Git Clone URL:https://github.com/alborghetti/ABAPFire.git
- Target Package: e.g. ZABAPFIRE

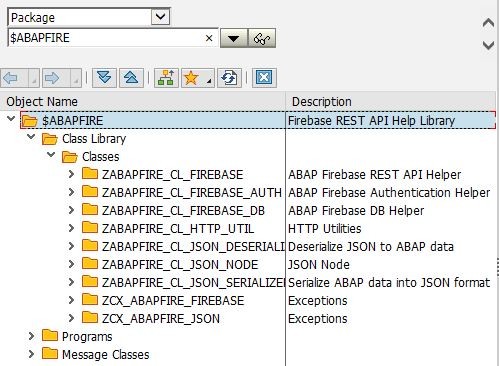
If everything goes well, you should have the help library installed (I developed it in an ABAP 740 System, but it should be compatible starting from ABAP 702):
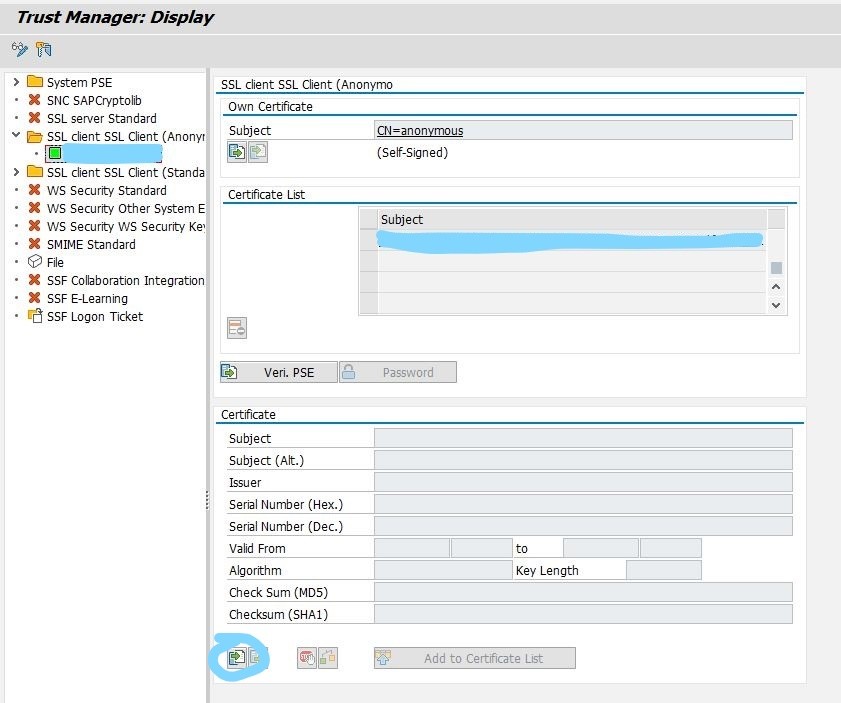
As next step, you have to install the Google CA SSL certificate that you can download here. This is required because all traffic from and to Firebase is protected using HTTPS connections.
Start transaction STRUST and add the certificate under the Anonymous SSL Client Identity:
Now it is time to sign in into Firebase and create a new project, as soon as you have it, click on link “Add Firebase to your web app”:

This will open a pop-up with the configuration parameters you need for consuming Firebase services in your web App and also in the client ABAP program we are going to develop.
As soon as you have this info, create following ABAP program in your SAP system:
REPORT ztest_firebase.

TYPE-POOLS : slis.
DATA:
  firebase     TYPE REF TO zabapfire_cl_firebase,
  lcx_firebase TYPE REF TO zcx_abapfire_firebase,
  ls_config    TYPE zabapfire_cl_firebase=>ty_firebase_config.

PARAMETERS:
  p_email TYPE string LOWER CASE,
  p_pass  TYPE string LOWER CASE,
  p_path  TYPE  string LOWER CASE DEFAULT '/flights' OBLIGATORY.

AT SELECTION-SCREEN OUTPUT.

  LOOP AT SCREEN.
    IF screen-name = 'P_PASS'.
      screen-invisible = '1'.
      MODIFY SCREEN.
    ENDIF.
  ENDLOOP.

START-OF-SELECTION.

**********************************************************************
* Initialize App
**********************************************************************
  ls_config-apikey = '[your_apikey]'.
  ls_config-authdomain = '[your_authdomain]'.
  ls_config-databaseurl = '[your_databaseurl]'.
  ls_config-messagingsenderid = '[your_messagingsenderid]'.
  ls_config-projectid = '[your_projectid]'.
  ls_config-storagebucket = '[your_storagebucket]'.

  firebase = zabapfire_cl_firebase=>initialize_app( ls_config ).

**********************************************************************
* Authenticate
**********************************************************************
TRY.
      firebase->auth->authenticate_with_email(
        EXPORTING
        email = p_email
        password = p_pass ).
    CATCH zcx_abapfire_firebase INTO lcx_firebase.
      MESSAGE i000(zabapfire_msg) WITH lcx_firebase->get_text( )
        DISPLAY LIKE 'E'.
      EXIT.
  ENDTRY.

**********************************************************************
* Set data
**********************************************************************
TYPES:
      BEGIN OF ty_abap,
        $key        TYPE string,
        carrid      TYPE s_carr_id,
        connid      TYPE s_conn_id,
        fldate      TYPE s_date,
        planetype   TYPE s_planetye,
        deptime     TYPE s_dep_time,
        cityfrom    TYPE s_from_cit,
        airpfrom    TYPE s_fromairp,
        cityto      TYPE s_to_city,
        airpto      TYPE s_toairp,
        carrname    TYPE s_carrname,
     END OF ty_abap.
  DATA:
    ls_parameters TYPE  zabapfire_cl_firebase_db=>ty_get_parameters,
    lt_abap       TYPE TABLE OF ty_abap,
    ls_fc         TYPE slis_fieldcat_alv,
    lt_fc         TYPE slis_t_fieldcat_alv.

  FIELD-SYMBOLS:
    <ls_abap>     TYPE ty_abap.


  SELECT
    sflight~carrid AS carrid
    sflight~connid AS connid
    sflight~fldate AS fldate
    sflight~planetype AS planetype
    spfli~deptime AS deptime
    spfli~cityfrom AS cityfrom
    spfli~airpfrom AS airpfrom
    spfli~cityto AS cityto
    spfli~airpto AS airpto
    scarr~carrname AS carrname
    FROM sflight
    INNER JOIN spfli ON spfli~carrid = sflight~carrid AND
                        spfli~connid = sflight~connid
    INNER JOIN scarr ON scarr~carrid = sflight~carrid
    INTO CORRESPONDING FIELDS OF TABLE lt_abap.


  TRY.
      firebase->db->set(
        EXPORTING
          path =  p_path
          child = lt_abap ).
    CATCH zcx_abapfire_firebase INTO lcx_firebase.
      MESSAGE i000(zabapfire_msg) WITH lcx_firebase->get_text( )
        DISPLAY LIKE 'E'.
      EXIT.
  ENDTRY.


  ls_fc-fieldname = '$KEY'.
   ls_fc-seltext_m = 'Firebase key'.
   ls_fc-lowercase = abap_true.
   APPEND ls_fc TO lt_fc. CLEAR ls_fc.
   ls_fc-fieldname = 'CARRID'.
   ls_fc-seltext_m = 'Carrier Id'.
   APPEND ls_fc TO lt_fc.
   ls_fc-fieldname = 'CONNID'.
   ls_fc-seltext_m = 'Connection Id'.
   APPEND ls_fc TO lt_fc.

   CALL FUNCTION 'REUSE_ALV_GRID_DISPLAY'
     EXPORTING
       it_fieldcat   = lt_fc
     TABLES
       t_outtab      = lt_abap
     EXCEPTIONS
       program_error = 1
       OTHERS        = 2.
Of course, you have to change following data with your Firebase project parameters:
**********************************************************************
* Initialize App
**********************************************************************
  ls_config-apikey = '[your_apikey]'.
  ls_config-authdomain = '[your_authdomain]'.
  ls_config-databaseurl = '[your_databaseurl]'.
  ls_config-messagingsenderid = '[your_messagingsenderid]'.
  ls_config-projectid = '[your_projectid]'.
  ls_config-storagebucket = '[your_storagebucket]'.
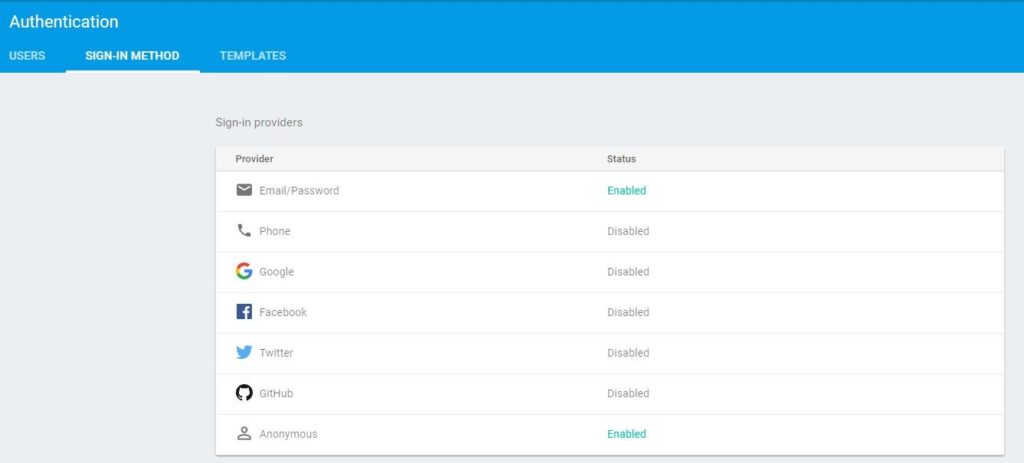
This program is also assuming that you have activated the sign-in method Email/Password in Firebase console and that you have created a user:
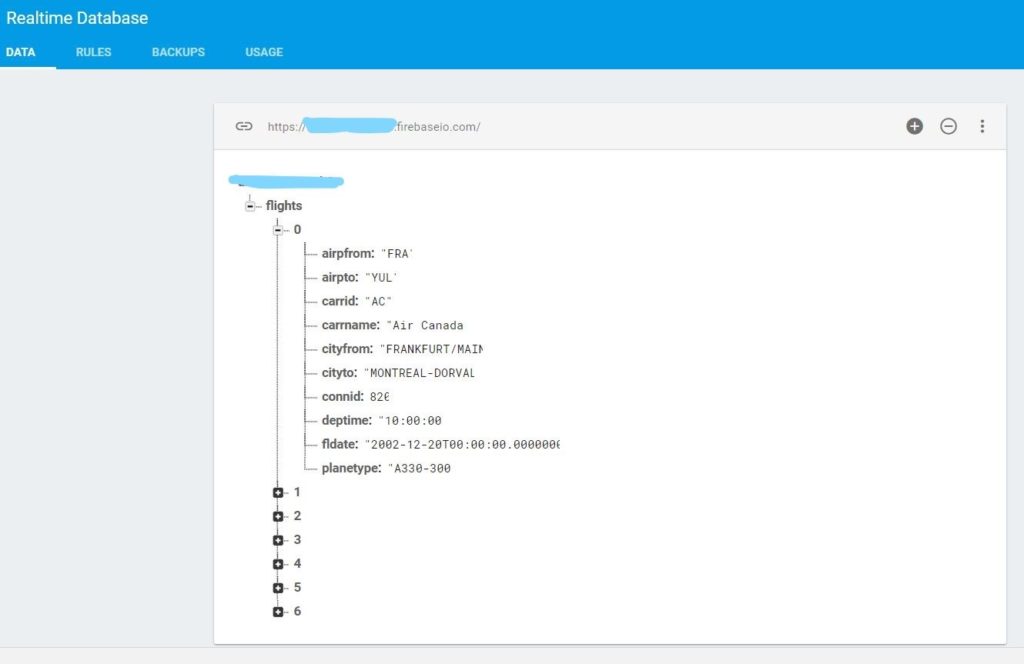
Executing this program, in Firebase DB Console you should see the SFLIGHT data replicated into Firebase DB:
OK ABAP part is done! You can now create a web or mobile App that uses this data!
It is not topic of this article to explain how to build a web App! That would not be possible. But if you want, you can clone from following repository the demo App I built and reuse it:https://github.com/alborghetti/ABAPFire.app.git
This are the steps you have to follow:
- Install GitHub desktop and clone the above repository in a local folder, or if you know how to do it, just clone the repository with git.
- Install Node.js and NPM
- Install Angular CLI (this App is based on Angular 2):
npm install -g @angular/cli
- Go in the folder were you have cloned the App and install all Node Packages:
npm install
- Change the Firebase configuration parameters in file .\src\environments\firebaseConfig.ts
    export const firebaseConfig = {
        // Paste all this from the Firebase console...
        apiKey: 'your_apikey',
        authDomain: 'your_authDomain',
        databaseURL: 'your_databaseURL',
        projectId: 'your_projectId',
        storageBucket: 'your_storageBucket',
        messagingSenderId: 'your_messagingSenderId'
    };
- Test the App
ng serve
If everything is OK, you can access to http://localhost:4200/ and see the application running.
I think this proposed approach can work quite well for any mobile or web applications, whenever a limited interaction with SAP back-end is required (like – for instance – a business or user specific dash-board)
Of course, for other kinds of applications, such as a complete e-commerce solution, SAPUI5 and Fiori approach would be the best way to go for.
But if you just need – as I said – an application that consumes a more or less static set of data from your SAP system, with this demo you could implement it in an easier way, thus avoiding to set-up an SAP Fiori Architecture… process which might result quite demanding in time and effort consumption.
I hope you enjoyed this article and in case you have any further suggestions or questions, just contact me @ info@inquaero.com

.png&w=3840&q=75)
.png&w=3840&q=75)
.png&w=3840&q=75)